
aka "Whatever, They Say That Fat Thumbs are Indicative of Creativity, Anyway"
Hannah, the youngest of us three sisters, has two fat thumbs. I, being the middle kid, have one fat thumb and one normal thumb. Carrie, our older sister has two normal thumbs. Now, I think that we are all creative in our own ways, but I think our "thumb karma" is hilarious. There- our secret is out- and you will see Hannah's fat thumbs in this tutorial!
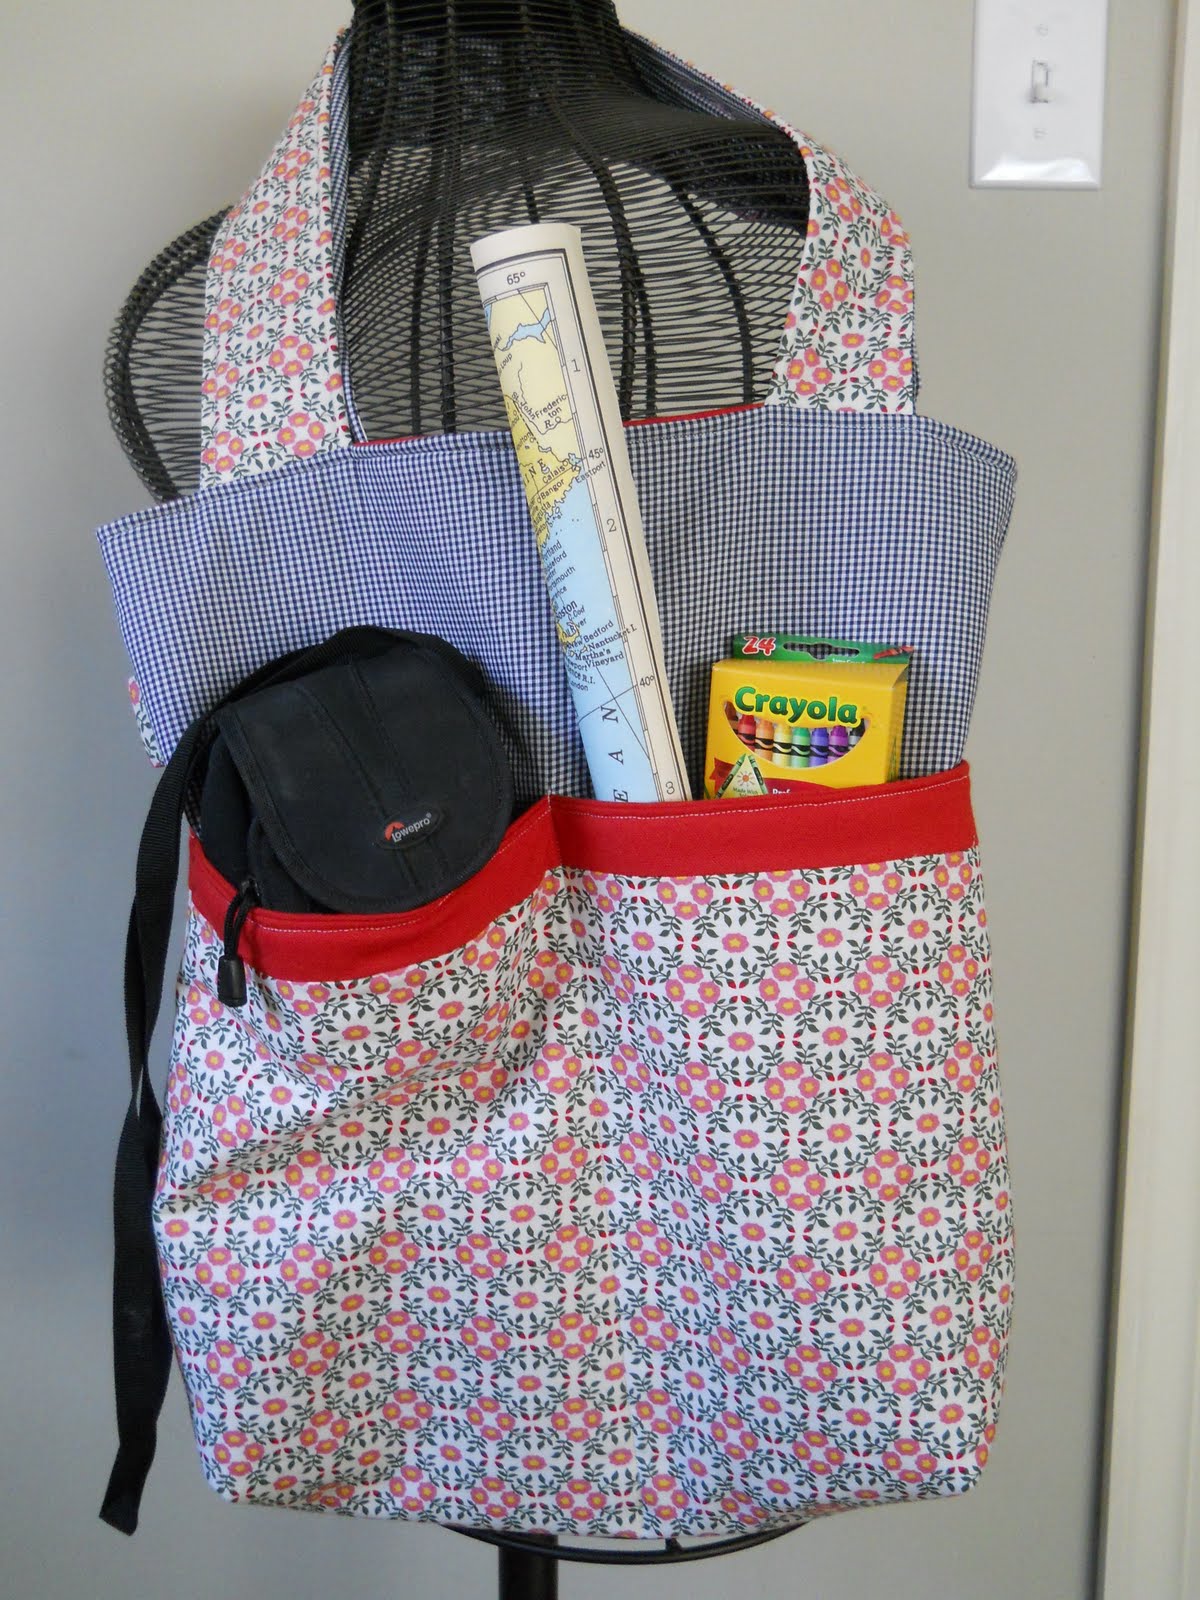
We created this really sweet looking tote bag out of fabrics that were reminiscent of our girlhood. Our mom was always whipping something up on her sewing machine for us girls- dolls, pillows, nightgowns- and she always picked out fabrics that matched each of our unique personalities. Just one more reason we love ya' so much, momma!

This tote has four outer pockets (two on each side). After documenting the process, we realized this may not be a "beginner" project. You may need to know some terms like back stitch, and top stitch, and ... oh- we'll see. Give us feedback in the comment section about how we could've made it easier, better, or whatever.
materials:
- fabric (we used 3 different styles to create this look)
- scissors
- fusible fleece (or interfacing)
- sewing machine
- thread
- ironing board and iron
1) Measure and cut your fabric pieces


for the main part of the bag, we are using blue and white gingham fabric 2 pieces 18"x20"
for the outer pockets, we are using a small floral print fabric 2 pieces 13"x18"
for the stripe at the top of the pockets AND for the lining of the bag, we are using a red fabric
2 pieces 2"x18" (for stripe at top of pockets) and 2 pieces 18"x20" (for lining) and
2 pieces 14"x18" (for pocket lining)

also, cut 2 pieces of fusible fleece at 18"x20"
and 2 pieces at "14x18" (for pockets)
~ iron fabric pieces
2) Sew the top strips of red fabric (Hannah added this step as a little embellishment, to tie the red into the red lining, visually, and so that the floral wouldn't be right up against the gingham, to give the eye a break) to both floral pieces- RIGHT SIDES TOGETHER:

3) Press seams open:

4) Iron the 14"x18" fusible fleece to the pocket fabrics that you have just created
*make sure that the glue dots are touching the WRONG SIDE of the fabric

*it was about this time that Hannah became embarrassed of her ironing board cover and wanted me to ask the blogging community if there were any good tutorials on making a new one- we're not big fans of pastel plaids!
5) Iron the 2 18"x20" fusible fleece to the main bag fabric (in our case, the gingham)

6) Now we are going to create a "backing" or lining for the pockets in the red fabric;
sew red pocket liners (2 pieces of 14"x18") to top of pockets, fold over, and press seam:


7) Top stitch the top of the pocket strip:

8) Pin the pockets to the bag material and sew down the middle so that there will be two pockets on both sides
* Hannah's tip for finding the middle quickly is to fold the fabric in half and pinch it; then you can place a pin there to guide you in sewing down the middle (just make sure to take the pin out before your needle gets to it!)


at the top and the bottom of the pockets, back stitch a couple of times using the "reverse" lever on your machine (shown above)
9) Once you have added the outer pockets to the gingham (main part of the bag), pin the two sides RIGHT SIDES TOGETHER:

 -try to line up the tops of the pockets so that when it is sewed together, it looks the same on both sides
10) Sew around the three sides (don't sew up the top!)
And then trim the excess if needed


 and... don't wear black when you sew! :)
11) Square off the ends of your corners by making a triangle and sewing a straight line like this:


 you can trim off the triangle if you want to
12) Time to make the liner! Get your red fabric and pin together
(Hannah decided to add a pocket to the liner at the last minute- we left this step out, but don't want you to get confused if you see floral fabric on the red!)

13) Sew around three edges (not the top!), being sure to leave an opening on the bottom side (3-4 inch opening should do it)
Also, make sure to square off the edges using the same technique you used on the bag part (in step 11)


14) Time to make the straps-
-you can use any two fabrics you want- we used the gingham and the floral
-cut out one piece of fabric 4"x34" (the width will shrink somewhat once sewn; you can make the straps shorter than 34" also, if you want- they turned out a little long for Hannah's liking)
-cut out one more piece of coordinating fabric at 4"x34"
-cut out one piece of fusible fleece at 4"x34" and iron to WRONG side of one of the strap pieces
-sew fabric straps along length WRONG SIDES TOGETHER, leaving both ends open
-turn inside out, press, and top stitch


15) Place the liner inside the bag RIGHT SIDES TOGETHER (remember, Hannah added a floral pocket to the red liner that is not in the tutorial)
place the straps in between the liner and the bag and pin in place:


16) Sew all along the top, back stitching when you sew over the handles (this reinforces them and makes them stronger)


17) Here comes the fun part! Turn bag inside out by pulling the bag (gingham) through the liner (red):


Almost Done!
(the gingham is weird and looks almost zebra stripey here, but Han wanted me to make sure you all know that it is indeed gingham!)
18) All you need to do now is top stitch over the top of the bag, and voila! You've got a super sweet tote bag!
(Hannah added a few things that aren't in this tutorial like the inside pocket, a magnetic snap closure, and a little tag on the outside )


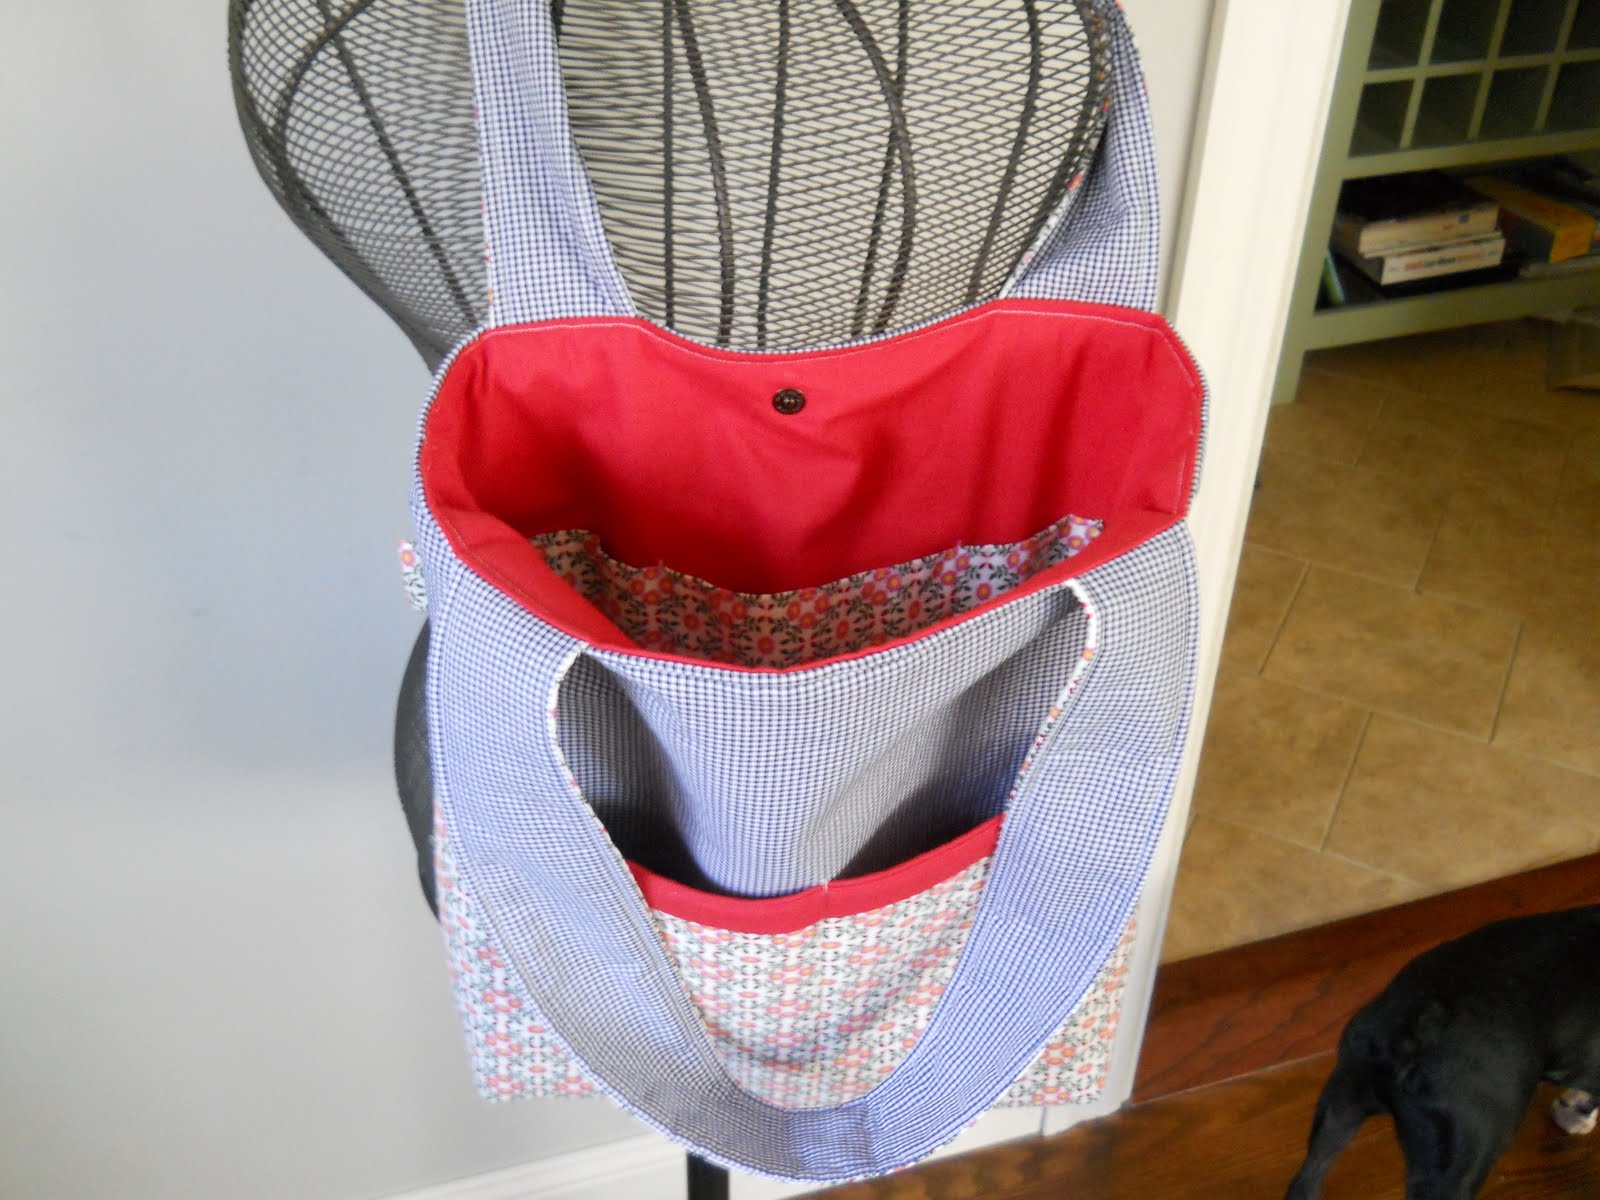

Tote that tote to the pool, the beach, the park- anywhere you please- there's plenty of storage inside and out! Hope this tutorial was easy enough to follow, and we wish you happy sewing!
And if you don't feel like making this bag, we're thinking about putting it up in our Etsy shop for sale.
Came over from One Pretty Thing. I have 2 fat thumbs too but still wondering if I'm creative. Thanks for this tutorial, will bookmark it for later.
ReplyDeleteGreat bag! I am featuring it at somedaycrafts.blogspot.com. Grab my "featured" button.
ReplyDeleteI just came from Somedaycrafts.blogspot to see you totes. I love them and I became a new follower.
ReplyDeleteThat's a great blog.
thank you
Thanks guys! We love making them:) We plan on adding some more tutorials soon, so check back often!
ReplyDeleteI love the pockets! Totes are great, but it always seems like little things get lost in the bottom! I love this one!
ReplyDeleteThanks for linking up to Show and Tell Saturday!
Lorie- thanks for letting us link up! Love your site:)
ReplyDeleteSo glad i found this tutorial. Fond of diy bag. Pockets design is so useful.
ReplyDelete